Can You Get Your Belongings Back After an Auction Is Scheduled?
Dove Storage • May 30, 2025
When a storage unit tenant falls behind on rent, storage facilities in the U.S. may schedule an auction to sell the contents of the unit. But what if you're the renter and you want to get your belongings back after the auction has already been scheduled? Is it too late? Fortunately, the answer is not always. Here's what you need to know.
Understanding the Storage Lien Process
When you sign a self-storage rental agreement, you're agreeing to certain terms, including timely monthly payments. If you fall behind, most states allow storage facility owners to place a lien on the contents of the unit. This means the facility has a legal right to sell your items to recover the unpaid rent.The storage lien process is regulated by state laws, but many follow similar steps:
Grace Period
– After a missed payment, there’s usually a grace period (often 5–30 days).
Notice of Default
– If you remain delinquent, the facility must notify you in writing that your account is in default.
Auction Notice
– If payment isn’t received, you’ll be notified of an upcoming auction, usually with a minimum number of days' notice (typically 14 days or more).
Auction Date Set
– A date is scheduled and may be advertised publicly, often online or in local publications.
Can You Get Your Stuff Back After an Auction Is Scheduled?
The short answer is yes, but there’s a deadline. Up until the actual moment the unit is auctioned off—and sometimes even slightly after—you may still be able to reclaim your belongings. Here’s how:
1. Pay the Balance Before the Auction
Most facilities will allow you to stop the auction by paying the full past-due balance, including:
Rent owed
Late fees
Any auction-related fees (like advertising)
Once the balance is cleared, the facility cancels the auction, and you regain full access to your unit.
Pro tip: Call the storage facility as soon as possible and ask for a detailed breakdown of the amount due. Don’t wait until the last minute—some facilities require payment by the day before the auction.
2. Request a Payment Plan (if available)
Some storage facilities may offer a short-term payment plan or delay the auction if you show intent to pay. While not guaranteed, it never hurts to ask. Be honest about your financial situation and make a good-faith effort to pay what you can. Note: Not all states require facilities to offer payment plans, and many won’t once the auction date is set.
3. Recovering Items After the Auction Begins
If the auction has started or already taken place, your options become limited, but not impossible:
If the unit hasn’t sold yet:
If the auction is live and your unit hasn’t come up yet, you may still be able to pay in full and stop the sale. This depends entirely on the facility’s policy and state law.
If the unit was sold:
Once the unit is sold, ownership of the contents typically transfers to the winning bidder. However, some bidders may be willing to return personal items (like photos or documents) out of courtesy. You can try contacting the facility to connect you with the buyer.
What Happens If You Do Nothing?
If you ignore notices and don’t pay by the auction date, your belongings will likely be sold. Facilities are usually only trying to recoup lost rent, not profit. The winning bid might be less than your debt, but any remaining balance still belongs to you unless your contract says otherwise.
Note: Some states require storage operators to refund surplus proceeds from the auction after deducting the owed rent and fees. You may be entitled to the extra money, but only if you follow up.
Legal Protections and State Variations
Each state in the U.S. has its laws governing storage liens and auctions. For example:
California requires at least 14 days’ notice and allows for reclaiming items before the auction.
Texas permits email notifications if agreed upon in the lease.
Florida requires a notice of sale to be published in a newspaper or online platform.
Always check your lease agreement and local laws to understand your rights and deadlines.
Preventing Auction Situations in the Future
To avoid losing your belongings:
Set up autopay to prevent missed payments.
Communicate early if you’re struggling financially—some facilities are willing to work with you.
Know your lease terms, including grace periods and late fees.
Update your contact info so you never miss important notices.
If your storage unit is headed for auction, it’s not too late to act. By understanding your rights, communicating with the facility, and paying your balance promptly, you may be able to recover your belongings, even after an auction is scheduled. But time is critical—waiting too long may mean your items are gone for good. Stay informed, act quickly, and always read your storage contract thoroughly to avoid surprises down the line.
Facing storage payment issues or need a reliable self-storage provider? Visit www.dovestorage.com
to explore affordable storage options and talk to a team that values transparency and flexibility. Don’t wait—protect your belongings and regain peace of mind today.
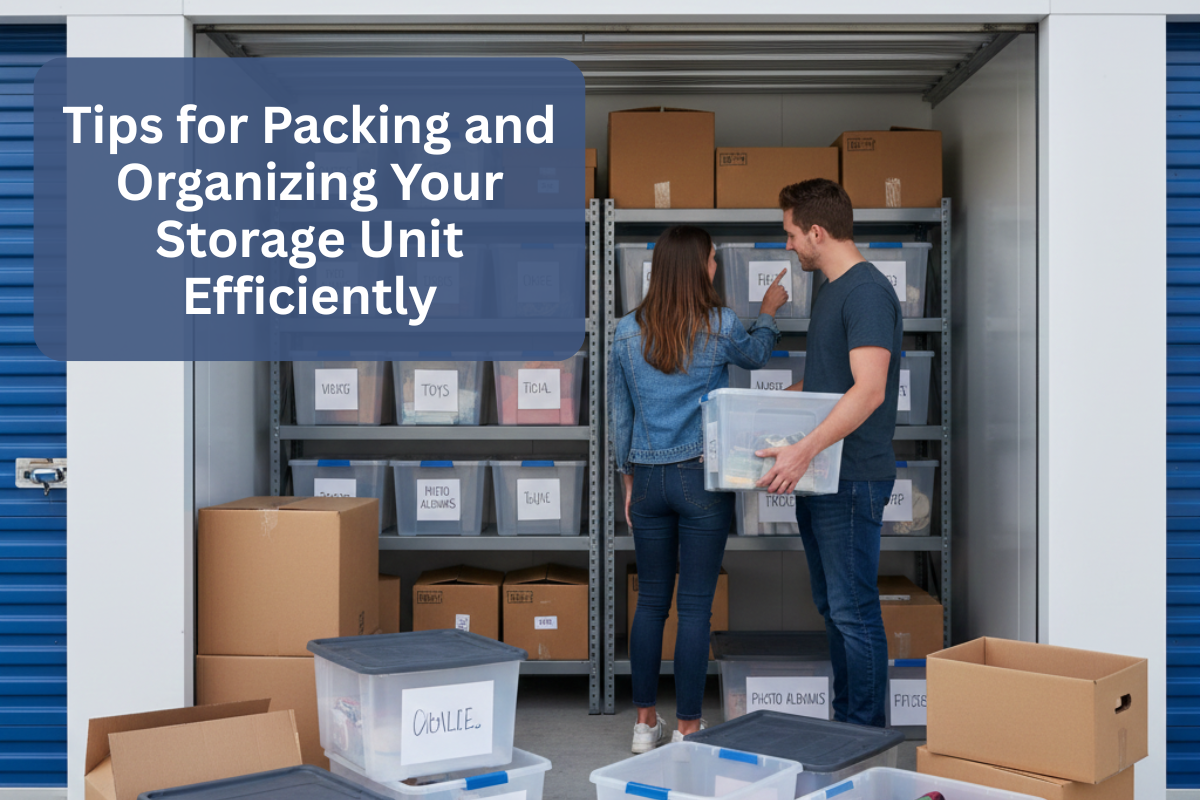
Packing for a storage unit doesn’t have to feel overwhelming. With the right plan, you can maximize space, protect your belongings, and make it easy to find what you need later. Whether you’re storing seasonal décor, extra furniture, moving items, or keepsakes, a well-organized unit helps you stay clutter-free at home while keeping everything accessible and secure. Here’s how to pack and organize your storage unit efficiently. 1. Start With a Clear Plan Before You Pack Before placing anything into your storage unit, take some time to plan what’s going in, how often you’ll need to access it, and what needs extra care. Sort items into groups: Store Keep at home Donate Discard Ask yourself: Will I need this soon, or is it seasonal? Does this item have sentimental or long-term value? Should this be stored in a sturdy bin or a simple moving box? This step saves time when loading your unit and prevents unnecessary clutter. Pro Tip: Create a simple inventory list—either on paper or on your phone—to track what you’re storing. 2. Choose the Right Storage Unit for Your Needs At Dove Storage, we offer a variety of unit types designed to protect your belongings and provide convenient access. Here are some options to consider: Climate-Controlled Units Ideal for sensitive items like photos, electronics, wood furniture, artwork, and documents. These units help maintain a stable temperature and humidity level, preserving your valuables over time. Drive-Up Units Perfect for heavy or bulky items. You can pull your vehicle right up to the door, making loading and unloading easier. Indoor Units Great for added protection from outdoor elements, often located inside secure, monitored buildings. Choosing the right space ensures your items stay in good condition and accessible when you need them. 3. Pack Smart for Safety and Space Efficiency Packing the right way is essential for maximizing your unit and keeping everything safe. Use Sturdy, Uniform Boxes Same-size boxes stack neatly and make it easier to build stable rows. Label Everything Clearly Write the room, category, and specific contents on each box. When you come back months later, you’ll be grateful you did. Use Shelving When Possible Shelving units help elevate boxes, improve airflow, and make it easier to grab what you need without digging through stacks. Leave a Center Aisle Creating a walkway down the middle of your unit ensures you can reach items in the back without having to move everything around. Pro Tip: Store heavier items on the bottom, lighter ones on top, and keep fragile items in protected corners or shelves. 4. Organize Based on How Often You’ll Need Items Accessibility is key. Place items you’ll need more frequently toward the front of the unit. Examples: Holiday décor Sports equipment Baby items you’re rotating out Tools or small appliances you use occasionally Less frequently used items—like long-term keepsakes, archived documents, or bulky furniture—can be placed toward the back. This simple strategy saves you time and keeps your unit frustration-free. 5. Protect Fragile, Valuable, and Sentimental Items If you’re storing items with personal or monetary value, it’s worth taking extra steps to keep them safe. Tips: Wrap breakables in bubble wrap or foam Use airtight bins for photos, documents, and fabrics Avoid stacking anything heavy on delicate items Keep electronics off the floor in case of unexpected moisture At Dove Storage, our facilities are equipped with features such as secured access points, onsite management, and well-maintained buildings to help protect your belongings. Pro Tip: Store mirrors, frames, and TVs vertically—not flat—to prevent damage. 6. Maximize Your Space With Smart Layout Techniques A strategic layout makes your unit feel larger and easier to navigate. Try these layout ideas: Line the walls with boxes and stack vertically Use furniture like dressers or bookshelves to store smaller items inside Place mattresses and bed frames upright to save space Fill hollow spaces—like drawers, bins, or plastic totes—with lighter items By using every inch intentionally, you’ll make your storage unit work harder for you. 7. Maintain Your Storage Unit Over Time Staying organized doesn’t stop after you close the door. Make it a habit to visit your unit periodically to: Rotate seasonal items Check boxes for wear or sagging Update your inventory list Rearrange items as needed to keep pathways clear A few minutes every season helps keep your storage unit efficient, safe, and ready whenever you need something. A Well-Packed Unit Makes Life Easier Packing and organizing your storage unit isn’t just about saving space—it’s about reducing stress, protecting what matters, and creating a more comfortable home. A well-planned storage strategy ensures you can find your belongings easily and keep your living space open and clutter-free. At Dove Storage, we’re here to make your storage experience simple, secure, and stress-free. Our clean, affordable units are designed to fit your needs—whether you're storing furniture, seasonal décor, or sentimental items. Visit Dove Storage today to find the perfect unit for your next move, home project, or decluttering journey.
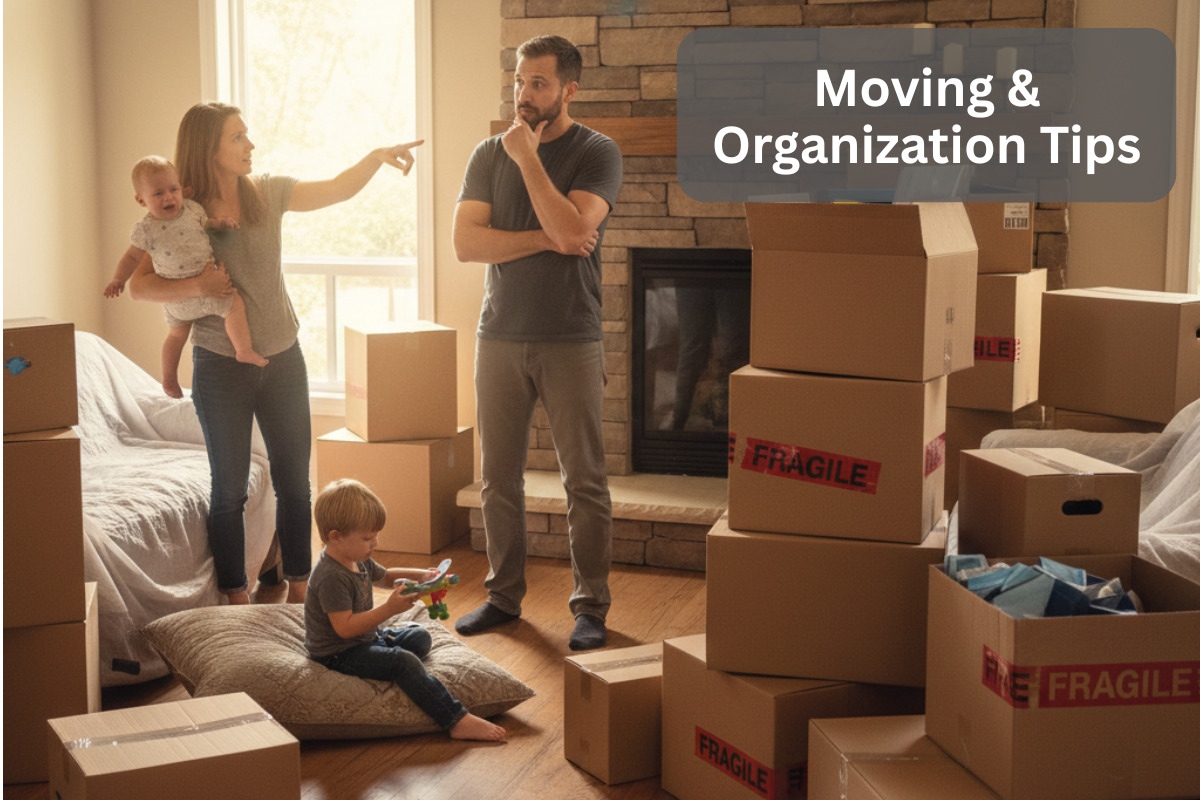
Moving into a new home—or simply reorganizing your current one—can feel overwhelming. Between packing, sorting, and trying to keep track of everything, it’s easy for clutter to pile up and stress to creep in. But with the right plan (and the right storage solutions), your move can feel smoother, more efficient, and far less chaotic. Whether you’re downsizing, upgrading, or giving your space a fresh start, using a storage unit can make the entire process more organized and manageable. Here’s how to approach moving and home organization with confidence—and how Dove Storage can support you every step of the way. 1. Start Fresh With a Strategic Declutter Before you pack a single box, take time to review what you own. Moving offers the perfect opportunity to start fresh and lighten the load. Walk through your home room by room and sort items into four simple categories: keep, pack, store, and let go. Ask yourself: Do I still need or use this? Is it seasonal or occasional? Will storing it make my move easier? Items like holiday décor, bulky sports gear, extra furniture, or keepsakes are great candidates for a storage unit. Storing these items before moving day helps reduce clutter and makes packing more focused and efficient. Pro Tip: As you sort, label items clearly—this saves time and prevents mix-ups later. 2. Pick the Best Storage Unit for Your Move Choosing the right type of storage unit can simplify your entire moving process. Here are a few options to consider: Climate-Controlled Units: Best for sensitive items like wood furniture, electronics, photos, and important documents. They help protect belongings from temperature and humidity changes. Drive-Up Units: Ideal for large or heavy items. Pull your vehicle right up to the door for easy loading and unloading. Indoor Units: A great option for added protection from weather, with access inside secure buildings. At Dove Storage , you’ll find a variety of unit sizes and types designed to fit your needs. Whether you’re storing a few boxes or an entire household’s worth of belongings, there’s a unit that matches your move. 3. Pack Smart for a Smooth Moving Day Packing isn’t just about getting items into boxes—it’s about setting yourself up for an organized new beginning. Here’s how to pack efficiently: Use uniform boxes so they stack easily and safely. Label all sides of your boxes with clear descriptions. Keep essentials separate , such as toiletries, clothing, chargers, or kitchen basics. Use sturdy bins or shelves inside your storage unit to keep everything accessible and off the floor. Pro Tip: Create a simple color-coding system for rooms—this makes unpacking a breeze. 4. Use Storage as a Staging Space One of the biggest moving hacks is using a storage unit as a temporary holding area. Store non-essential or bulky items before moving day so your home stays clutter-free while you pack. This makes: Cleaning easier Staging your home smoother Moving furniture safer and more organized Once you’re settled in your new place, you can bring items back gradually—or keep them stored for seasonal use. 5. Protect Your Most Important Belongings Whether you’re moving across town or reorganizing your home, some items need extra care. Consider using storage for valuables or fragile belongings, such as: Family heirlooms Photo albums or artwork Collectibles Important documents Antique furniture For added safekeeping, pack items in airtight or waterproof containers and store them in a secure, monitored facility like Dove Storage . Pro Tip: Keep a digital inventory so you always know where everything is. 6. Organize Your New Home With Purpose Once your move is complete, take your time settling in. A storage unit gives you the flexibility to bring items back into your home gradually—and intentionally. With fewer items to unpack at once, you can: Design each room intentionally Reorganize closets without pressure Keep garages and hallways clear Avoid clutter from day one A storage unit acts as an extension of your new home—available when you need it, out of the way when you don’t. 7. Maintain Your Storage Unit Over Time Just like your home, your storage unit works best when it’s maintained regularly. Every few months: Rotate seasonal items Check for damaged containers Refresh labels Reorganize shelves Remove items you no longer need Staying organized helps your storage unit remain a practical, efficient tool during and after your move. Make Your Move Easier With Dove Storage Moving doesn’t have to be stressful. With intentional planning, smart packing, and the convenience of a storage unit, you can create a more organized transition and a more comfortable home. At Dove Storage , we offer clean, secure, and affordable storage solutions designed to fit every stage of your move. Explore unit sizes, features, and availability at DoveStorage.com and find the perfect fit for your moving or organizing needs. Let’s make your next move your smoothest one yet.

Keeping your belongings safe and in great condition starts with choosing the right storage solutions—and maintaining them well throughout the year. Whether you’re storing seasonal décor, family keepsakes, furniture, or business items, proper care and organization go a long way. With a little planning and the right storage setup, you can protect your items from temperature changes, dust, wear, and accidental damage. Here’s how to store your belongings confidently all year long. 1. Start With Smart Packing Before moving anything into storage, take time to pack with protection in mind. The right materials significantly reduce the risk of damage, especially during long-term storage. Here are a few essentials to use: Sturdy, uniform boxes for easier stacking Bubble wrap , packing paper, or foam to cushion delicate items Plastic bins for moisture-sensitive belongings Quality packing tape to secure boxes properly Ask yourself: What items are most fragile? What needs extra padding or a waterproof container? Which items will I need to access sooner? Pro Tip: Double-box breakables—like dishware and glass décor—for added security. 2. Choose the Right Storage Unit for Your Needs Not all items store the same way. Selecting the right type of storage unit is key to maintaining the condition of your belongings, especially during seasonal changes. At Dove Storage, you’ll find a variety of unit types designed to help safeguard your items year-round: Climate-Controlled Units: These maintain a stable environment, making them ideal for photos, wood furniture, electronics, documents, and artwork. Drive-Up Units: Perfect for bulky items, tools, equipment, and anything you want easier access to. Indoor Units: Located inside secure buildings, these offer an added layer of protection from outdoor elements. If you’re storing temperature-sensitive or high-value items, a climate-controlled unit is a smart investment. 3. Organize Your Storage Unit Thoughtfully Once you’ve packed everything, how you arrange your unit matters just as much. A well-organized unit keeps your items protected and makes future access stress-free. Try these tips: Use shelving: Keep boxes elevated for airflow and ease of access. Stack heavier boxes on the bottom, lighter boxes on top. Label everything clearly with item descriptions and rooms. Leave a small aisle down the center so you can reach items without unstacking everything. Pro Tip: Keep frequently used items—like seasonal decorations or sports gear—near the front. 4. Protect Items From Temperature & Seasonal Changes Seasonal temperature shifts are one of the biggest threats to stored belongings. Even in well-maintained facilities, certain items need extra care to avoid warping, fading, cracking, or mildew. Here’s how to protect your items year-round: Use climate-controlled storage for wood furniture, electronics, photos, collectibles, and paperwork. Avoid plastic bags , which trap moisture and cause mold. Use breathable fabric covers for furniture and mattresses. Place moisture absorbers (like silica gel packs) inside boxes with sensitive items. Rotating seasonal items—like holiday décor, winter coats, or summer gear—also helps prevent overcrowding and keeps your unit organized. 5. Keep Valuables and Sentimental Items Extra Secure If you’re storing irreplaceable pieces or family keepsakes, give them a little additional protection. Dove Storage locations offer gated access, secure indoor units, and well-maintained facilities to help keep your possessions safe. For your most important items: Use airtight, waterproof bins for photos, documents, and fabric items. Wrap delicate memorabilia individually. Keep a digital inventory with photos and descriptions of stored items. This keeps your belongings protected and makes it easier to track what’s inside your unit. 6. Add Protective Accessories A few small accessories go a long way in preventing accidental damage: Furniture covers to protect against dust Pallets or shelving to keep items off the ground Corner protectors for mirrors, frames, or furniture Lock upgrades, such as disc locks, for added peace of mind Pro Tip: Always lock your unit with a high-quality lock—it's one of the simplest ways to enhance security. 7. Check Your Storage Unit Periodically Just like your home, your storage unit benefits from occasional check-ins. Seasonal visits help ensure everything stays organized and protected. During your visits, make sure to: Rotate seasonal items in or out Check boxes for signs of wear or shifting Replace any damaged packing materials Review your inventory list A little maintenance goes a long way in keeping your belongings safe all year long. Storing your belongings doesn’t have to be stressful. With careful packing, smart unit selection, and a consistent organizing system, you can keep your items protected no matter the season. At Dove Storage, we provide clean, secure, and affordable storage options designed to make storing simpler and safer. Whether you're storing household items, business supplies, or seasonal essentials, our units help you stay organized and worry-free—year-round. Visit Dove Storage to find the perfect unit for your needs today.

Keeping your belongings safe is one of the most important things when you choose a storage unit. At Dove Storage, we know peace of mind matters just as much as space. Whether you're storing household items, business inventory, or keepsakes, here are the key security features you should look for — and how Dove Storage delivers. 1. Secure Access Controls Before anything else, your storage facility should make sure only authorized people can enter. Gated or locked perimeter – prevents unauthorized vehicles or folks from entering. dovestorage.com+2dovestorage.org+2 Personalized access codes or keycards for each tenant – so you know access is limited to who should be there. dovestorage.com+1 Drive-up or indoor unit layouts where access points are controlled and supervised. Indoor units typically offer added protection. dovestorage.com+1 Why this matters: If your items are stored behind strong access control, there’s less chance of unauthorized entry, theft or accidental access. At Dove Storage we provide locked entry points and verified tenant access so your unit isn’t just out of sight—it’s out of reach from the wrong people. 2. Surveillance & Monitoring Once access is locked down, the next layer is monitoring. High-definition surveillance cameras covering key zones: entrances, unit halls, exterior perimeters. dovestorage.com+1 Motion sensors or activity detection systems to send alerts if something unusual happens. dovestorage.org+1 Well-lit exteriors and unit corridors to improve visibility and safety. dovestorage.com Why this matters: The presence of cameras and sensors deters potential threats and also helps if you ever need to review an incident. It ensures your items are under watch even when you’re not there. 3. On-Site and Unit-Specific Protections It’s one thing to secure the facility at large; it’s another to safeguard what’s inside your unit. Clean, well-maintained buildings that show the operator is invested in security and upkeep. dovestorage.org Indoor or climate-controlled units that add an extra layer by being inside a secure structure. dovestorage.org+1 Strong, tamper-resistant locks on individual units and encouragement for tenants to use high-quality padlocks. dovestorage.com+1 Why this matters: Even if the facility is secure, if your unit is poorly maintained, or the door lock is cheap, your items may still be vulnerable. At Dove Storage, we partner secure facility design with tenant-friendly advice for best practices (e.g., quality locks, well-stacked units). 4. Digital & Tech-Driven Features Modern facilities go beyond fences and cameras. Digital rentals, access logs, and online payment systems for less paperwork and more transparency. dovestorage.org Smart access systems: keyless entry codes, mobile apps, or unique tenant verification. dovestorage.com Automated monitoring systems that alert staff to anomalies faster. dovestorage.com+1 Why this matters: Technology can make your storage experience smoother and safer — less manual handling means fewer gaps. By integrating digital access and logs, Dove Storage ensures that access is both convenient for you and accountable for us. 5. Transparent Protection & Customer Participation Security isn’t just about what the facility provides—it’s also about what you do. Clear guidelines on what you should store (and how) to minimize risk. dovestorage.com+1 Advice on keeping an inventory of your stored items, taking photos, and using quality containers/locks. dovestorage.com Protection plan or insurance options to cover unexpected events or losses. dovestorage.com Why this matters: The best security features in the world won’t fully protect you if you don’t participate in the process. At Dove Storage we’ll walk you through best practices: packing well, labeling clearly, and keeping records to make sure your items are retrievable and protected. 6. Routine Maintenance & Facility Condition A strong security system is only effective if the facility is well-maintained. Regular inspections to ensure cameras, gates, locks, and lighting are all operational. Clean, dry storage units free from leaks, pests, or structural issues. dovestorage.org+1 Clear signage, good landscaping (which can reduce hiding spots), and safe pathways for customers. Why this matters: A neglected facility raises risk — from water damage to break-ins. At Dove Storage we commit to clean, well-kept facilities because security starts with good upkeep. 7. Access for Peace of Mind (Within Operational Structure) While some storage providers advertise “round-the-clock” access, what matters most is that you can access your unit when you need it, and that access is secure. During operating hours (or the access hours your facility supports), the facility should manage secure entry and exit. Even outside normal hours (if available), access should still be covered by the same strong controls, surveillance and logging. Your ability to retrieve items shouldn’t compromise security—for example, by having unlocked doors or unrestricted entry. Why this matters: The flexibility to access your items is valuable—but only if it doesn’t reduce safety. At Dove Storage we focus on giving you secure access under controlled conditions, so you’re never trading convenience for risk. Final Thoughts Choosing a storage unit is more than just finding space—it’s about finding safe space. With the right features in place, you can store with confidence. At Dove Storage, we bring together solid access controls, modern surveillance, digital tools, and customer-centered practices so you can focus on what matters: your belongings, not the “what ifs.” If you’re ready to store items and want a facility built with security in mind, visit us or contact us to learn how Dove Storage can help make a smart, safe choice for your storage needs.

When you rent a self-storage unit, you’re trusting it to keep your belongings safe and secure. Whether you’re storing furniture, business inventory, seasonal décor, or sentimental keepsakes, it’s easy to assume your items are fully protected once inside a storage facility. However, while facilities like Dove Storage are built with security in mind, having a protection plan adds an essential layer of safety—and peace of mind. Let’s explore why a protection plan is a smart choice for your storage unit and how it helps safeguard the things that matter most. 1. Understanding What a Storage Protection Plan Covers A protection plan helps safeguard your stored belongings from unexpected events such as fire, theft, water damage, or natural disasters. Even though facilities like Dove Storage take extensive measures to maintain secure and well-maintained units, unforeseen incidents can still occur. Depending on your plan, coverage may include: Fire and smoke damage Water or storm damage Theft or vandalism Pest-related damage Accidental damage during handling It’s always best to review your plan carefully to understand exactly what’s covered and any exclusions that might apply. 2. Why Your Homeowners or Renters Coverage Might Not Be Enough Many people assume their homeowners or renters coverage automatically protects items kept in a self-storage unit. While some policies extend limited off-site coverage, it often comes with restrictions—typically covering only a small percentage of your total property value. For example, if your homeowners policy provides 10% off-site coverage, and your belongings are worth $20,000, only $2,000 would be protected while in storage. That might not be enough to replace valuable furniture, electronics, or collectibles. That’s why it’s worth confirming with your provider or considering a separate storage protection plan designed specifically for your needs. 3. Protecting Your Belongings Beyond Facility Security At Dove Storage, our facilities feature gated access, security cameras, and well-lit premises to keep your belongings safe. But even with these strong security measures, a protection plan provides an added safeguard against unpredictable events that no one can control. Think of it as a partnership—you handle the protection plan, and we handle the secure storage environment. Together, your belongings get the best protection possible. 4. What to Consider When Choosing a Storage Protection Plan Before selecting a plan, take time to evaluate: The total value of your stored items: Create an inventory list and estimate replacement costs. The type of items you’re storing: Certain valuables like jewelry, antiques, or collectibles may need special coverage. Plan exclusions: Some plans don’t cover mold, mildew, or flood damage, so review terms carefully. Deductibles and claim limits: Know what you’d pay out-of-pocket in case of loss or damage. Pro Tip: Keep photos or a digital record of your stored belongings. It not only helps with claims but also makes managing your inventory easier over time. 5. How a Storage Protection Plan Gives You Peace of Mind A protection plan isn’t just about financial safety—it’s about confidence. Knowing your items are covered helps you store with less worry and more freedom. Whether you’re between moves, running out of space at home, or safeguarding business inventory, a protection plan ensures your investment is protected. By combining Dove Storage’s secure facilities with a reliable protection plan , you’ll have the reassurance that your belongings are in good hands—no matter what life brings. 6. Make the Smart Choice for Your Stored Belongings Protecting your possessions starts with choosing the right storage facility and the right protection plan. At Dove Storage, we provide clean, secure, and affordable storage units in a range of sizes to meet your personal or business needs. While we do our part to keep your items safe, a storage protection plan ensures you’re covered from every angle—because your peace of mind is priceless. Visit Dove Storage today to find the perfect unit for your needs and learn more about keeping your belongings protected and secure.

When it comes to storing your belongings, security is one of the most important things to consider. Whether you’re keeping family heirlooms, business inventory, or seasonal items, you want peace of mind knowing your valuables are safe. But how do you really know if a self-storage facility is secure? Here’s what to look for before renting—and how Dove Storage helps keep your belongings protected. 1. Check for Secure Access Controls A good self-storage facility limits who can enter the property. Look for gated access where only tenants can enter using personalized codes or keycards. This helps prevent unauthorized individuals from getting onto the property and adds a controlled layer of protection for every unit. At Dove Storage , our facilities are designed with secure access systems that help ensure only customers and staff can enter the premises. 2. Look for Well-Lit, Monitored Premises Lighting and visibility are major parts of a secure environment. Brightly lit driveways, hallways, and entrances deter unwanted activity and make tenants feel safer when visiting their units—day or night. Our Dove Storage locations feature well-maintained lighting and camera monitoring throughout the property to help protect your belongings and ensure a safe environment for all visitors. 3. Evaluate the Property’s Overall Maintenance A clean, well-kept facility often reflects strong management and attention to detail—both essential for security. Broken gates, dim lights, or damaged fencing can be red flags that a facility isn’t properly monitored. At Dove Storage, we take pride in maintaining our facilities with regular inspections and upkeep. This commitment to cleanliness and organization helps ensure a safe, reliable experience for every customer. 4. Consider Indoor and Climate-Controlled Units Indoor and climate-controlled units add an extra level of protection. These units are typically located within locked buildings, offering an additional layer of security while also keeping your items safe from extreme temperatures and humidity. Climate-controlled units are ideal for sensitive items like electronics, wood furniture, documents, and photos—helping preserve their condition long-term. 5. Ask About Surveillance and Staff Presence A storage facility’s surveillance system plays a key role in security. Continuous camera monitoring helps record activity and provides peace of mind that the property is under watch. Some locations also have on-site staff who regularly check the grounds and assist tenants. Dove Storage locations are equipped with security systems and monitoring tools designed to keep your items protected around the clock. 6. Review the Unit’s Locking Options Your unit’s lock is the first line of defense. Look for facilities that allow or recommend high-quality locks such as disc locks or cylinder locks, which are harder to tamper with than standard padlocks. When you rent from Dove Storage, our team can guide you on the best lock type for your unit to help enhance your personal security. 7. Read Reviews and Ask Questions Before you sign a rental agreement, take time to read online reviews and ask the facility team about their security measures. Transparency is a good sign that the management values your trust and the safety of your belongings. At Dove Storage, we’re always happy to answer your questions about how we keep your items safe and our commitment to maintaining a secure, welcoming facility. Peace of Mind Starts with the Right Storage Choice Your belongings deserve a facility that values safety, cleanliness, and care. By checking for access control, surveillance, proper lighting, and maintenance, you can confidently choose a storage provider that meets your needs. At Dove Storage, we make your peace of mind our priority. With secure access systems, clean facilities, and a variety of unit options, we provide the reliable storage solution you can count on. Visit Dove Storage to find a secure, affordable unit near you and experience storage that keeps your belongings—and your confidence—protected.
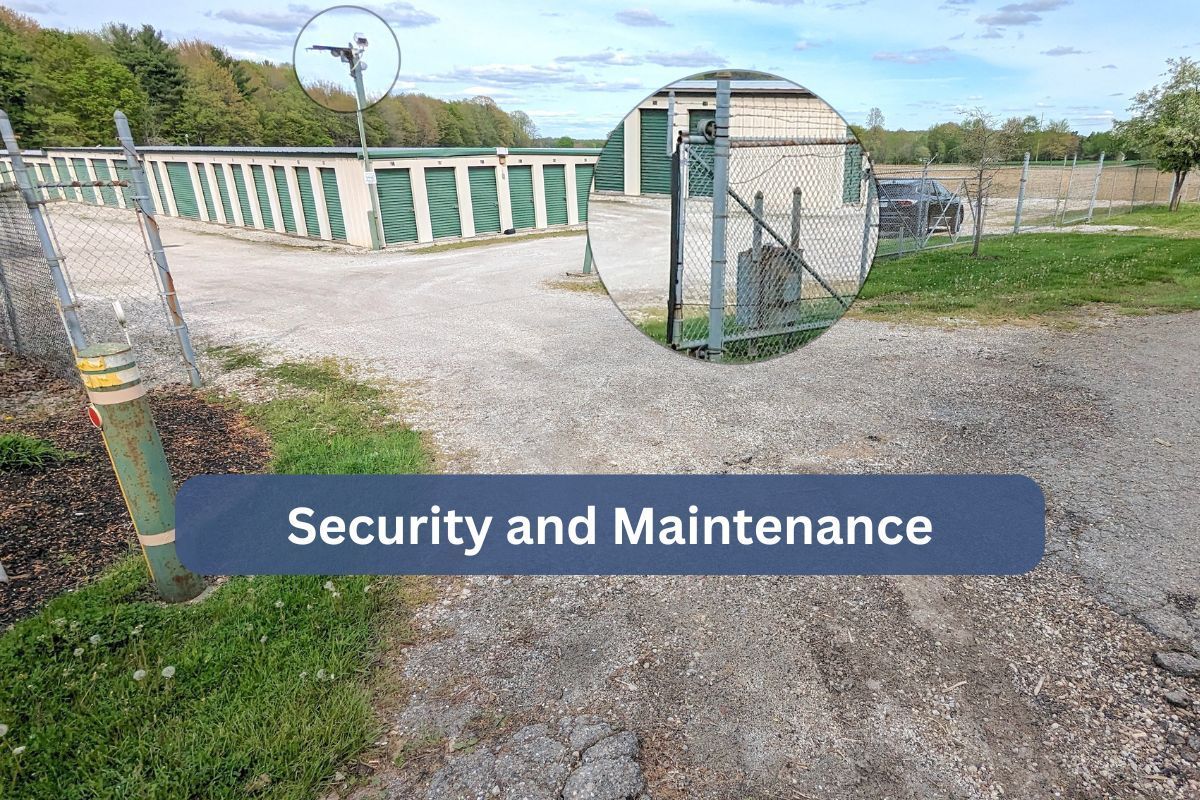
When choosing a self-storage facility, security and maintenance are two of the most important factors to consider. Your belongings deserve more than just extra space—they deserve a clean, well-kept, and secure environment where you can store with confidence. At Dove Storage, we take both seriously, making sure every customer feels at ease knowing their items are protected and stored in top condition. 1. Security You Can Trust Peace of mind starts with knowing your belongings are safe. That’s why Dove Storage locations are designed with multiple layers of protection. Our facilities feature gated access with unique entry codes, fenced perimeters, and bright, well-lit surroundings to ensure visibility and safety at all hours of the day. We also use advanced camera surveillance systems that monitor the property, helping to deter unauthorized access and provide an extra layer of reassurance. Every storage unit is built with durable materials and secure locks—because protecting what matters to you is our top priority. Pro Tip: When choosing your storage unit, use a high-quality lock for added protection and check that your insurance covers stored items. 2. A Commitment to Cleanliness and Care At Dove Storage, we believe that a well-maintained facility reflects how much we care about your belongings. Our staff conducts routine property checks to ensure that units, hallways, and outdoor areas remain clean, dry, and free from debris. We also take pride in keeping our units pest-free and weather-protected, so your items stay in the same condition you left them. From climate-controlled options to drive-up units, every space is designed to offer both convenience and care. Pro Tip: Use airtight containers or sealed bins for items like fabrics, documents, or electronics to maintain their quality while in storage. 3. Regular Maintenance You Can Rely On Maintenance isn’t just about appearances—it’s about ensuring your storage experience stays smooth and hassle-free. Our team regularly inspects doors, lighting, and building systems to keep everything functioning properly. We promptly address any repairs or upkeep needs so that our facilities continue to meet high standards of quality and reliability. This proactive approach means you can focus on organizing and storing your belongings without worrying about the condition of the facility. Pro Tip: Visit your unit periodically to check your items and rotate seasonal belongings. It’s a great way to stay organized and ensure everything remains in top shape. 4. Safe, Reliable Storage You Can Count On Whether you’re storing for a few months or the long term, you deserve a facility that’s both secure and well-maintained. At Dove Storage, we combine thoughtful design, consistent upkeep, and dependable security measures to protect your belongings and provide a positive storage experience. Your trust matters to us, and we’re dedicated to maintaining the clean, safe, and reliable spaces that our customers have come to expect. At Dove Storage , we go beyond just offering space—we provide security, cleanliness, and peace of mind. Discover a storage facility that treats your belongings with the same care you do. Visit Dove Storage today to find a secure and well-maintained unit that fits your needs.
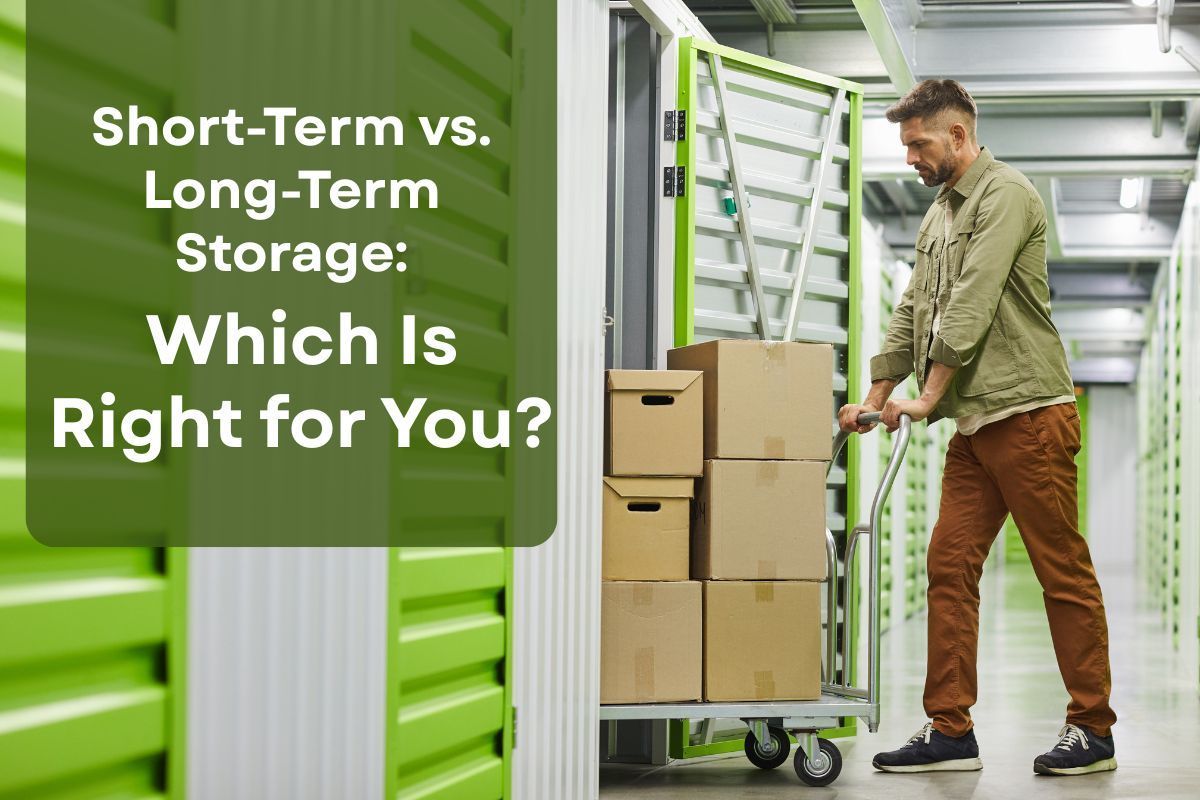
Life is full of transitions—moving to a new city, remodeling your home, welcoming a new family member, or simply needing extra space for your belongings. Whatever the reason, self-storage offers a flexible solution to help you stay organized and in control. But one important question often comes up: Should you choose short-term or long-term storage? While both options can make your life easier, they serve different needs. Understanding the differences will help you choose the right storage plan for your situation—and make the most of your space. 1. What Is Short-Term Storage? Short-term storage typically means renting a unit for a few weeks or months—ideal for temporary transitions or specific projects. You might need short-term storage if you’re: Moving between homes or apartments Renovating or decluttering Storing belongings during a college break or seasonal job Keeping furniture safe during a move or staging a home for sale Short-term storage gives you flexibility without a long commitment. You can rent for as little or as long as you need—perfect for life’s in-between moments. Pro Tip: When choosing short-term storage, consider drive-up units for quick access and easier loading and unloading, especially if you’ll be visiting your unit frequently. 2. What Is Long-Term Storage? Long-term storage is designed for keeping items safely stored for several months—or even years. This option works best for: Storing family heirlooms, collectibles, or keepsakes Holding furniture or household goods during extended travel or relocation Businesses needing offsite storage for inventory, documents, or equipment Military personnel or retirees downsizing their homes Long-term storage offers peace of mind for items you don’t need regular access to but still want to keep safe and in good condition. Pro Tip: For long-term storage, climate-controlled units are ideal. They help protect against temperature changes and humidity, keeping your items—especially wood, fabric, or electronics—in great shape year-round. 3. Key Differences Between Short-Term and Long-Term Storage Short-term storage typically lasts from a few weeks to a few months and is ideal for moves, home remodels, or any temporary need. It works best for frequent access and is usually paired with drive-up or standard units for convenience and flexibility. On the other hand, long-term storage spans several months to years and is better suited for long relocations, downsizing, or storing valuable items. Since access is less frequent, climate-controlled units are recommended to ensure protection and long-term preservation. 4. How to Decide Which Option Fits Your Needs Ask yourself a few simple questions: How long do I plan to store my items? How often will I need to access them? Are my belongings sensitive to temperature or humidity? Am I storing for a short project or long-term lifestyle change? If your situation is temporary—like moving or renovating—short-term storage is the better fit. If you’re storing valuable or rarely used items for months or years, long-term storage gives you the protection and stability you need. 5. Tips for Both Short- and Long-Term Storage No matter which option you choose, proper packing and organization go a long way in protecting your belongings. Use sturdy boxes and avoid overfilling them. Label everything clearly for easy retrieval. Store heavier boxes at the bottom and lighter ones on top. Keep an inventory list or take photos for reference. Visit your unit periodically to check on your items and reorganize if needed. These small steps help keep your storage experience smooth and stress-free—whether it’s for a few weeks or several years. 6. Find the Right Storage Solution at Dove Storage At Dove Storage , we make it easy to find a storage solution that fits your timeline, budget, and needs. Whether you’re looking for short-term flexibility or long-term peace of mind, we offer clean, secure, and affordable storage units in a variety of sizes. Our facilities are designed with convenience and safety in mind, so you can store your belongings confidently—no matter how long you need. Visit Dove Storage today to find the perfect unit and see how we can help simplify your storage experience.

Whether you’re moving, downsizing, or simply need extra space, renting a storage unit can be a smart and convenient solution. But one of the first questions most people have is, “How much does a storage unit cost?” The answer depends on several key factors — from the size and type of unit to its location and available features. At Dove Storage, we’re committed to helping you find the right unit at a fair price. Here’s what you need to know about the average cost of storage and what affects those prices. 1. Average Cost of a Storage Unit On average, self-storage units can range anywhere from around $50 to $250 per month , depending on several factors. Smaller units, like 5x5 or 5x10 spaces, typically cost less, while larger ones — such as 10x20 or 10x30 — come with higher monthly rates. For example: Small Units (5x5 or 5x10): Great for boxes, small furniture, or seasonal items. Medium Units (10x10): Perfect for the contents of a one-bedroom apartment. Large Units (10x20 or larger): Ideal for storing furniture, vehicles, or business inventory. When comparing prices, it’s important to look beyond the monthly rate. The value you get — such as location convenience, cleanliness, and security — makes a big difference. 2. What Affects Storage Unit Prices Several factors can influence how much you pay for a storage unit. Understanding these can help you choose the best option for your needs and budget. a. Unit Size Size is one of the biggest price drivers. The larger the unit, the higher the cost. Before choosing, take inventory of what you plan to store. You might find that a smaller space with good organization works just as well as a larger one. b. Climate Control Climate-controlled units typically cost a bit more, but they’re worth it if you’re storing temperature-sensitive items like furniture, electronics, photos, or important documents. These units help protect your belongings from humidity, extreme temperatures, and weather changes. c. Location Just like real estate, location matters. Units located in high-demand areas or near city centers tend to have higher rates. Dove Storage offers facilities in multiple convenient locations, making it easy to find a unit that balances cost and accessibility. d. Accessibility and Features Features such as drive-up access, security cameras, gated entry, and well-lit areas add value — and sometimes cost — to your rental. These amenities ensure safety and convenience for you and your belongings. e. Availability and Demand Storage prices can fluctuate based on local demand. During peak moving seasons, like summer or the start of the school year, prices may rise as more people look for storage solutions. Booking early or during off-peak months can help you save. 3. How to Get the Best Value for Your Storage Unit Getting a great deal on storage isn’t just about finding the lowest price — it’s about finding the right storage for your needs. Here are a few ways to maximize value: Compare Unit Sizes: Don’t pay for more space than you need. Pack Efficiently: Use boxes of similar sizes and stack smartly to make the most of your unit. Check for Promotions: Dove Storage often offers competitive rates and special discounts depending on the location. Choose the Right Type of Unit: For items with sentimental or financial value, climate-controlled options can prevent costly damage later on. 4. Why Choose Dove Storage At Dove Storage, we understand that everyone’s storage needs are unique. That’s why we offer a variety of unit sizes, both standard and climate-controlled, across multiple convenient locations. Our facilities are designed with security, cleanliness, and accessibility in mind — so you can store with confidence. Whether you’re looking for short-term storage during a move or long-term space for your belongings, Dove Storage makes it easy and affordable to find the perfect fit. Final Thoughts The cost of a storage unit can vary, but with the right approach, you can find a solution that fits your budget and keeps your belongings safe. By understanding what affects pricing and planning ahead, you’ll be able to choose the right size and type of storage that gives you the best value. Ready to find your ideal storage unit? Visit Dove Storage to explore available options and pricing near you.
Finding the right storage unit size can make all the difference between a cluttered, cramped space and one that’s efficiently organized and easy to access. Whether you’re moving, downsizing, or simply decluttering your home, understanding your storage options helps you save time, money, and stress. At Dove Storage , we offer a range of unit sizes designed to fit every need—from small personal items to large furniture and business inventory. Here’s a complete guide to help you choose the perfect fit. 1. Start by Assessing What You Need to Store Before choosing a unit size, take inventory of what you plan to store. Are you packing away boxes of household items, or do you need space for furniture and appliances? Write down larger items—like mattresses, sofas, or dining tables—and group smaller ones into boxes or bins. Pro Tip: Stackable boxes and uniform containers help maximize your space and make it easier to plan the right size. Ask yourself: Will I need frequent access to these items? Are there fragile or bulky pieces that need extra space? Do I plan to add more items later? Once you have a clear list, you’re ready to match your needs to a storage unit size. 2. Understanding Common Storage Unit Sizes Every storage facility has its own range of sizes, but here’s a general breakdown of the most popular options available at Dove Storage: 5x5 Unit – Small Closet Size Perfect for boxes, seasonal décor, personal documents, and small furniture. Ideal for: Students, renters, or anyone looking to clear out a closet or home office. Comparable to: A small walk-in closet. 5x10 Unit – Walk-In Closet Size Holds the contents of a small room—like a twin bed, dresser, and several boxes. Ideal for: One-bedroom apartments or small storage projects. Comparable to: A large walk-in closet. 10x10 Unit – Half Garage Size A great mid-size option that fits the contents of a one- to two-bedroom apartment, including furniture, appliances, and boxes. Ideal for: Families or individuals moving between homes. Comparable to: Half of a standard garage. 10x15 Unit – Large Apartment Size Spacious enough for several rooms’ worth of items, including large furniture, bikes, and appliances. Ideal for: A two- to three-bedroom home or long-term storage during renovations. Comparable to: A large bedroom or small garage. 10x20 Unit – Standard Garage Size Accommodates the contents of a full home or small business inventory. Some even use it for vehicle storage, depending on the location. Ideal for: Families relocating or storing vehicles and large items. Comparable to: A one-car garage. 10x30 Unit – Extra-Large Space The largest size typically available. Holds the contents of a large home, including furniture, appliances, and boxes from multiple rooms. Ideal for: Full-house moves, business storage, or long-term inventory needs. Comparable to: A two-car garage. 3. Consider Climate-Controlled vs. Standard Storage Depending on what you plan to store, choosing between standard and climate-controlled units can be an important factor. Climate-Controlled Units: Best for temperature-sensitive items such as wood furniture, electronics, artwork, and important documents. These units maintain a steady environment year-round to help prevent damage from humidity and heat. Standard Units: Great for general items, garage tools, outdoor equipment, or anything that’s not affected by temperature changes. If you’re unsure, it’s always better to choose climate control for long-term peace of mind—especially for valuable or delicate belongings. 4. Maximize Your Space with Smart Packing No matter which unit size you choose, organization makes all the difference. Use sturdy, same-size boxes for easier stacking. Label everything clearly by room or category. Use shelving units to take advantage of vertical space. Keep frequently used items near the front for easy access. Create a small aisle so you can reach boxes in the back without having to move everything around. Pro Tip: Take a quick photo of your packed unit—it’ll help you remember where things are and track what’s stored. 5. Choosing the Right Size with Confidence If you’re still unsure which size fits your needs, try visualizing your belongings in a room of similar dimensions—or visit our Dove Storage Size Guide for an easy visual reference. Our online guide helps you compare unit sizes side by side and see exactly what each can hold. Remember: It’s usually better to size up slightly rather than squeeze items into a smaller unit. You’ll have room to move around, stay organized, and avoid accidental damage to your belongings. 6. Simplify Your Storage Experience with Dove Storage At Dove Storage , we make it easy to find a clean, secure, and affordable storage solution that fits your lifestyle. Whether you’re storing a few boxes or an entire household, our team is here to help you make the most of your space. From compact 5x5 units to spacious 10x30 options, Dove Storage offers flexible sizes to match your unique needs. Explore our storage size guide or visit your nearest location to see how we can help simplify your storage experience. Choosing the right storage unit is all about balance—space, convenience, and protection. With the right size, you’ll enjoy a clutter-free home and peace of mind knowing your belongings are safe and accessible whenever you need them.