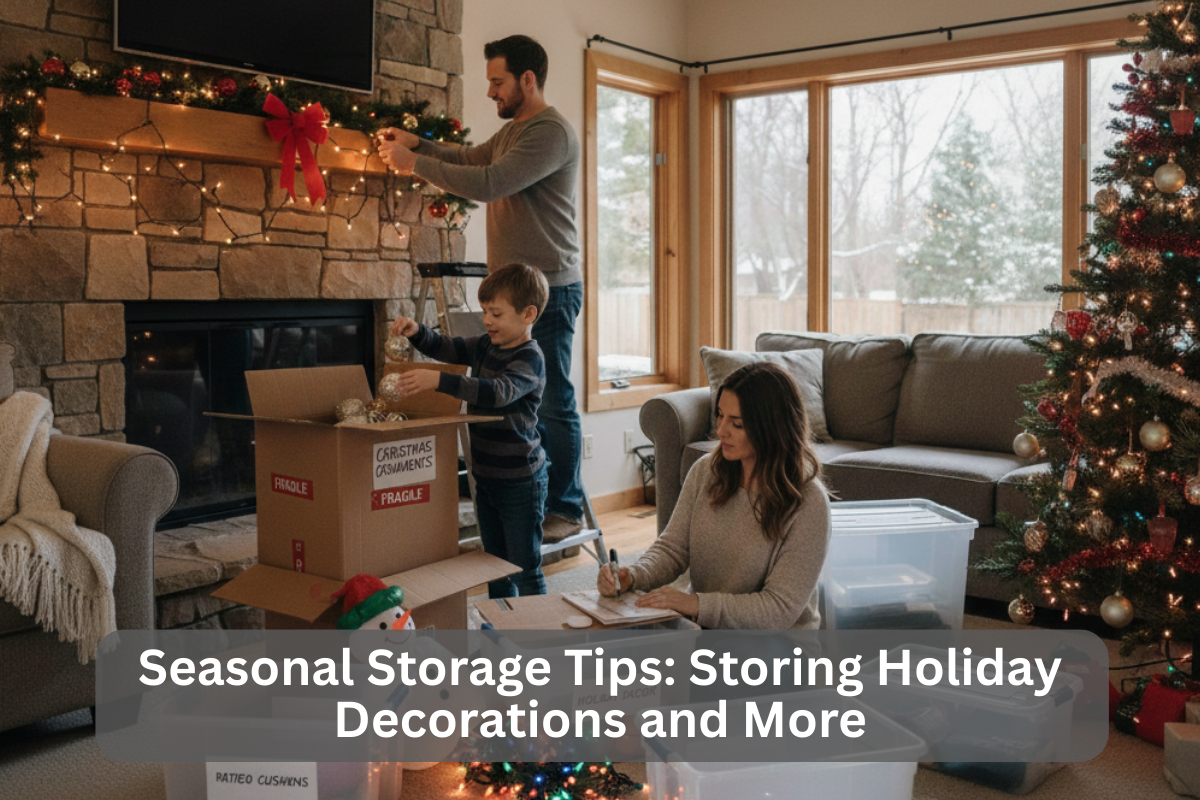
How Do I Pack a Storage Unit Efficiently?

Dove Storage • December 26, 2024


Packing a storage unit efficiently is crucial for maximizing space and ensuring that your items remain safe and easily accessible. Whether you're storing personal belongings, business inventory, or seasonal items, organizing your storage unit the right way can save you time, money, and frustration. In this guide, we'll walk you through the best strategies for packing your storage unit, including tips for maximizing space, keeping things organized, and ensuring your items stay protected.


1. Plan Ahead and Assess Your Needs - Before you even begin packing your storage unit, it's important to plan ahead. Take inventory of everything you plan to store and consider the following:


  • Item Size and Shape: Larger items, such as furniture or appliances, require more space, while smaller items, like boxes and bins, can be stacked more easily.
  • Frequency of Access: If you need frequent access to certain items, make sure they are packed in a way that allows easy retrieval without disturbing the rest of your belongings.
  • Climate Control: Consider whether your items are sensitive to temperature or humidity. If they are, you might need climate-controlled storage to protect them.


By taking stock of what you're storing, you can better organize your packing strategy.


2. Gather the Right Packing Supplies - The key to an efficient storage unit is having the right packing supplies. Here's a list of materials you'll need:


  • Sturdy Boxes: Choose various sizes of sturdy boxes to fit your belongings. Make sure they are not too heavy and can be stacked easily.
  • Packing Tape: High-quality tape will secure boxes and prevent them from opening during transport or storage.
  • Bubble Wrap and Packing Paper: These materials will help protect fragile items like glassware, electronics, and artwork.
  • Stretch Wrap: Great for securing furniture, appliances, and other large items to prevent them from getting scratched or damaged.
  • Plastic Bins: For items that you want to protect from dust or moisture, clear plastic bins are an excellent option.
  • Furniture Covers and Blankets: Use covers or moving blankets to protect furniture and other large items from dirt, dust, and damage.


By investing in these materials, you'll ensure that your items are packed securely and safely.


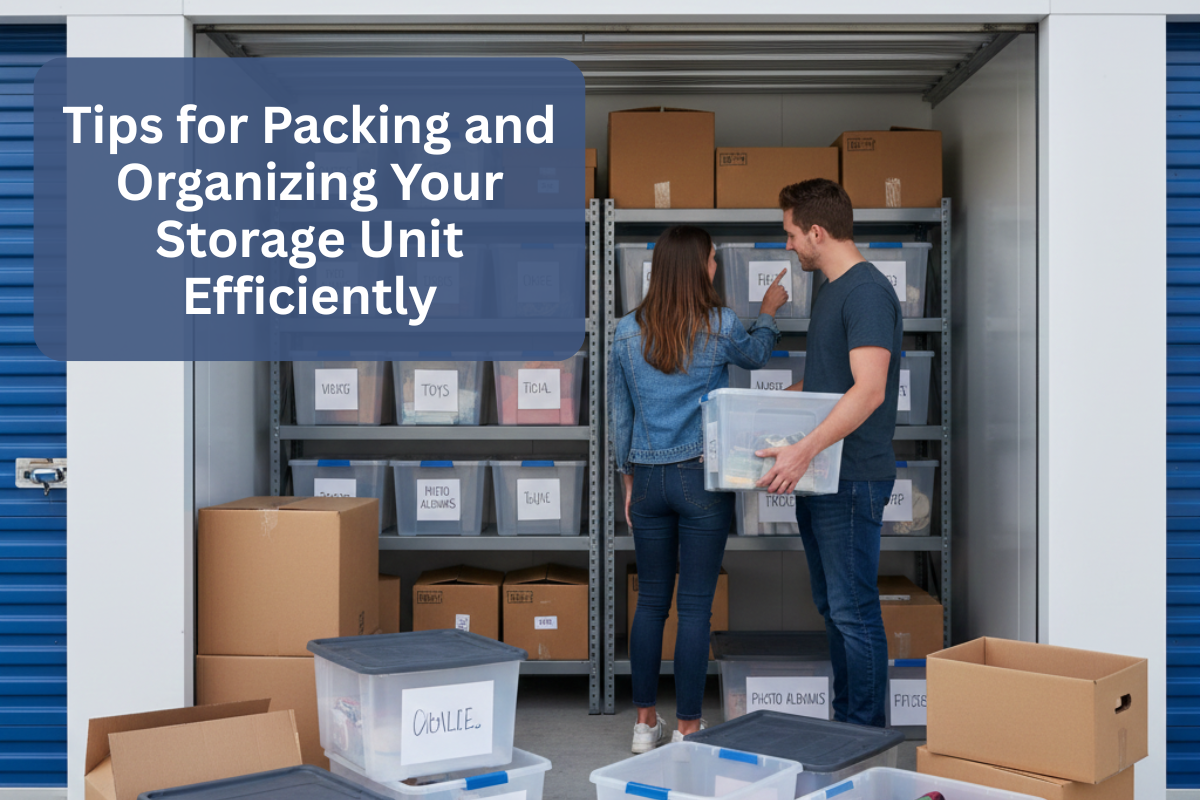
3. Maximize Vertical Space - When packing a storage unit, the goal is to make the most of the available space. One of the best ways to do this is by maximizing vertical space. Instead of stacking items haphazardly, think about how you can use the height of the storage unit effectively.


  • Stack Boxes: Stack your boxes from the floor to the ceiling, with the heaviest items at the bottom and lighter ones on top. This helps to avoid crushing fragile items and makes it easier to organize.
  • Utilize Shelving Units: If your storage facility allows it, consider bringing in shelves. This will help you keep things off the floor, allowing you to store more items in the same space.
  • Disassemble Large Items: For items like furniture, disassemble them when possible. This will help you save a lot of space and make it easier to store them in the unit.


4. Keep Frequently Used Items Accessible - If you anticipate needing access to certain items while they are in storage, pack those items in a way that makes them easy to retrieve. Here’s how:


  • Place Accessible Items at the Front: Items that you need often, like seasonal clothing, important documents, or frequently used tools, should be placed near the front of the unit for easy access.
  • Label Everything Clearly: Clearly label each box and bin with its contents. You can use color-coded labels or create an inventory list to make locating items easier.
  • Leave a Pathway: If you have multiple large items stored, make sure there is a clear pathway to access them. Avoid stacking boxes or bins in front of bulky items you might need to access.


5. Use Furniture as Storage - Furniture pieces can take up a lot of space, but they can also serve as valuable storage opportunities. Here's how to utilize them effectively:


  • Use the Inside of Furniture: For items that are small or fragile, store them inside larger furniture pieces, such as couches, dressers, or cabinets. This is especially useful for items like pillows, blankets, or smaller boxes.
  • Protect Furniture with Covers: Before storing furniture in your unit, protect it with moving blankets, plastic covers, or stretch wrap to prevent damage from dust, moisture, or scratches.


6. Avoid Overpacking Boxes - While it might seem tempting to pack as much as possible into each box, this can lead to problems. Overpacked boxes are more likely to break, and it can be hard to access items without making a mess. Instead, follow these tips:


  • Don’t Overfill Boxes: Leave a little extra room at the top of each box so that they can be sealed securely. This also allows you to add extra padding if needed.
  • Evenly Distribute Weight: Ensure that weight is evenly distributed within boxes. Heavy items should be packed in smaller boxes, while lighter items can go in larger boxes.


7. Protect Fragile Items - If you are storing fragile or valuable items, extra care is required to ensure their safety. Use the following strategies:


  • Wrap Fragile Items Individually: Use bubble wrap, packing paper, or foam peanuts to protect delicate items like glass, porcelain, or electronics.
  • Label Boxes with Fragile Items: Mark boxes that contain fragile items with “FRAGILE” labels so that anyone handling them knows to take extra care.
  • Place Fragile Items at the Top: Store fragile items on top of heavier, more durable items to reduce the risk of damage.


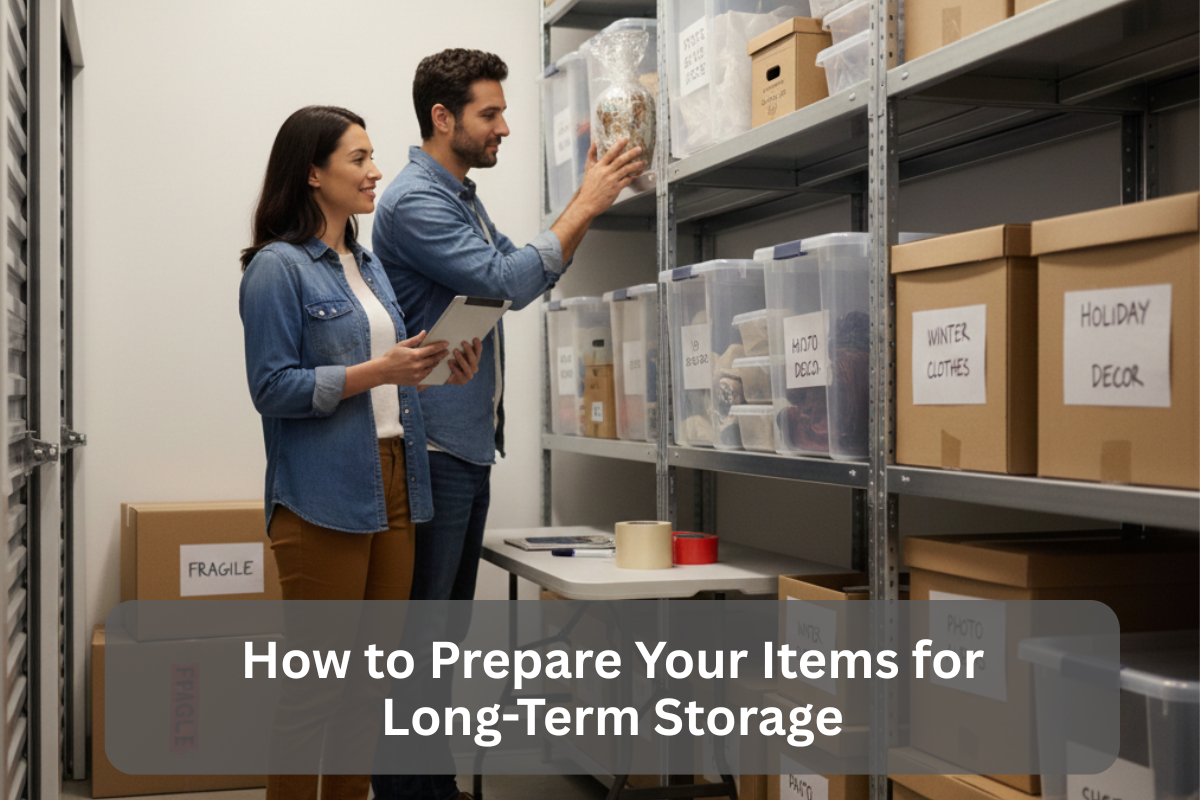
8. Keep a Detailed Inventory - One of the best ways to stay organized is by maintaining an inventory of your stored items. This can save you time when you need to find something in your storage unit. You can create a list on paper or digitally with photos and descriptions of each item. Be sure to update the list if you add or remove anything.


Packing a storage unit efficiently requires careful planning, the right materials, and strategic organization. By taking the time to think ahead, gather the necessary supplies, and use space wisely, you can ensure that your items are safe, accessible, and well-organized during their time in storage.


At
Dove Storage, we understand how important it is to make the most of your storage space, and we’re here to help. Whether you're moving, decluttering, or storing business inventory, our flexible and secure storage solutions are designed to meet your needs.


Contact us today or visit our website to learn more about how we can assist you with your storage requirements. Let us help you store your belongings with ease and efficiency!

By Dove Storage August 21, 2025
Learn if and how you can reclaim your belongings once a self-storage auction is scheduled, including deadlines, fees, and legal considerations.
By Dove Storage August 19, 2025
Moving due to deployment or PCS orders? Here are long-term storage tips for military families to keep belongings secure, organized, and ready for return.
By Dove Storage August 13, 2025
Downsizing your home? Discover how self-storage can ease the process, reduce stress, and help you stay organized while transitioning to a smaller space.
By Dove Storage July 24, 2025
Storing furniture long-term? Learn the best tips to protect your pieces from damage, dust, and pests. A must-read for U.S. renters using self-storage.
By Dove Storage July 22, 2025
Need extra space at home? Learn how to choose the right storage unit based on size, features, and cost. This guide helps U.S. renters pick the perfect solution for their household storage needs.
By Dove Storage July 16, 2025
Home renovations can be chaotic, but using a self-storage unit can help protect your belongings and streamline the process. Learn how to choose and use the right storage solution during remodeling projects.
By Dove Storage July 14, 2025
For college students in the U.S., moving between dorms, apartments, or back home during summer or winter breaks is a common experience. But constantly hauling furniture, textbooks, and dorm essentials across the country (or even just across town) can be time-consuming, expensive, and stressful. That’s why many students are turning to self-storage units to safely store their belongings between semesters. Whether you’re studying out of state, traveling abroad, or just need temporary storage while transitioning to new housing, self-storage offers a secure, affordable, and flexible solution. Here's what you need to know. Why College Students Use Storage Units Avoid Long-Distance Hauling For out-of-state students, it’s not practical to haul large items—like furniture, bedding, or mini-fridges—home during the summer or winter breaks. Self-storage provides a convenient place to leave things behind without taking them across state lines. Study Abroad or Internships Students who spend a semester abroad or take on summer internships in other cities need a place to store belongings while away. A storage unit allows students to travel light and return without the hassle of re-furnishing or moving everything again. Changing Dorms or Apartments Room changes, off-campus moves, or temporary housing shifts are common in college life. Storage units help bridge the gap when move-in and move-out dates don’t line up exactly. Shared Storage Saves Money It’s common for roommates or friends to share a unit and split the cost, making storage even more affordable during the off-season. What to Store Between Semesters Most students don’t need a large unit. Here are common items ideal for storage: Bedding, pillows, and linens Mini-fridges and microwaves Textbooks, notebooks, and school supplies Desk chairs or small desks Lamps, rugs, and decor Clothing and seasonal wear Small appliances or kitchen items Sports gear or bicycles Pro Tip: Avoid storing anything valuable like passports, laptops, or items with high sentimental value. Keep those with you during break. Choosing the Right Storage Unit Size Recommendations: 5' x 5' (25 sq. ft.): Great for boxes, a few bins, and small dorm essentials. 5' x 10' (50 sq. ft.): Ideal for a full dorm room or shared storage between two roommates. 10' x 10' (100 sq. ft.): Enough for shared storage between 3–4 students or for apartment-sized furniture. Climate-Controlled Units: If you're storing electronics, books, clothing, or wooden furniture in regions with hot, cold, or humid weather, consider a climate-controlled unit. These maintain consistent temperature and humidity to protect your belongings from mold, warping, and mildew. Drive-Up Access: If you’re moving heavy items or want to load and unload quickly, a drive-up unit may be more convenient. How to Pack for Storage Proper packing ensures that your items stay safe and organized: Use Plastic Bins Over Cardboard: Durable, moisture-resistant, and stackable. Label Everything Clearly: Use waterproof markers and labels to identify what’s inside. Disassemble Furniture: Take apart beds, shelves, and desks to save space. Store Items Vertically: Stack to make the most of your unit’s height. Place Heavier Items at the Bottom: Prevents crushing lighter, delicate items. Cover Items: Use breathable covers for mattresses or cloth furniture. Pro Tip: Keep an inventory list on your phone or take photos of what you’ve stored to make unpacking easier when you return. Finding a Student-Friendly Storage Facility When looking for a storage facility near your campus, prioritize the following: Student Discounts or Promotions: Many facilities offer first-month-free deals or reduced rates for college students. Short-Term Leases: Month-to-month rental agreements offer flexibility for students who only need storage for a few months. Security Features: Look for facilities with 24/7 surveillance, gated access, good lighting, and individual unit locks. Online Booking and Contactless Access: Reserve and manage your unit from anywhere for added convenience. Cost-Saving Tips for Students Share with Roommates or Friends: Splitting a 5'x10' unit can reduce your individual cost to $20–$40/month, depending on location. Book Early: Storage units near college campuses fill up fast at the end of semesters—reserve early to lock in availability and pricing. Use Student ID for Discounts: Always ask if the facility offers student pricing. Check for Free Pickup: Some facilities near colleges offer free van service or pickup during student move-out seasons. Safety and Insurance Even in secure facilities, accidents can happen. Consider these safety tips: Invest in a Good Lock: Choose a disc or cylinder lock that’s hard to cut. Get Insurance Coverage: Some homeowners' or renters' insurance policies cover stored items. If not, facilities often offer affordable protection plans. Don’t Store Prohibited Items: Avoid food, flammable materials, or liquids that could leak or attract pests. Self-storage between semesters is an affordable and efficient way for college students to manage their belongings during academic breaks. It saves time, money, and energy, especially for those studying far from home or facing temporary housing transitions. With the right size unit, smart packing, and a secure facility, you can leave campus with peace of mind, knowing your dorm room essentials are safe and ready for your return.
By Dove Storage June 27, 2025
Security is a top concern for anyone renting a self-storage unit. Whether you're storing personal belongings, business inventory, or seasonal items, protecting your valuables is a priority—and that starts with the lock you choose. In today’s market, renters have two primary options: traditional padlocks and smart locks. But which one is safer? This article breaks down the pros and cons of smart locks vs. traditional locks, so you can make the best decision for your storage security. What Are Traditional Locks? Traditional locks, such as padlocks or disc locks, use a physical key or combination to open. They’re simple, widely used, and time-tested for basic security. Common Types: Padlocks – Portable and easy to use. Disc locks – More secure than padlocks; harder to cut with bolt cutters. Combination locks – Use rotating dials with no keys required. Traditional locks are made from heavy-duty metal and can be highly secure, depending on the quality and type. What Are Smart Locks? Smart locks are electronic locking systems that use Bluetooth, Wi-Fi, or keypad access, often controlled through a smartphone app or cloud-based platform. These locks offer features such as remote access, temporary digital keys, and activity logs. Common Types: Bluetooth-enabled locks – Controlled via app and often used without internet. Wi-Fi-enabled locks – Allow remote access and monitoring. Keypad locks – Allow access using a PIN code. Some self-storage facilities provide smart locks as part of their security features or offer them as an upgrade for tenants. Security Comparison: Smart Locks vs. Traditional Locks 1. Tamper Resistance Traditional locks: High-quality disc locks offer strong resistance to cutting and prying. However, cheaper padlocks can be easily broken. Smart locks: Good models are built with tamper alerts and reinforced hardware, but some low-cost versions may be vulnerable to hacking or power failure. Winner: Tie – Depends on the lock’s build quality. 2. Access Control Traditional locks: Only individuals with the physical key (or combination) can access the unit. If the key is lost or copied, your security is compromised. Smart locks: You can grant or revoke access digitally, set temporary codes, and monitor access history. Winner: Smart Locks – Greater flexibility and control. 3. Convenience Traditional locks: Require carrying a key or remembering a combination. No setup or batteries required. Smart locks : Controlled by smartphone or keypad—no key needed. Great for managing multiple users or remote access. Winner: Smart Locks – More convenient, especially for business users. 4. Power and Connectivity Traditional locks: No electricity needed; always functional. Smart locks: Rely on batteries or power sources. Battery failure or app glitches can limit access. Winner: Traditional Locks – Dependable with no tech issues. 5. Cost Traditional locks: Cost between $10–$30 for a decent model. Disc locks may run slightly higher. Smart locks: Typically range from $60–$250, depending on features and brand. Winner: Traditional Locks – More budget-friendly. Use Cases: Which Is Better for You? Use Smart Locks If You: Need remote access or multiple users (ideal for business owners or shared units) Want digital logs of access activity Prefer managing access via smartphone Rent at a facility that supports digital access Use Traditional Locks If You: Want a no-fuss solution Are you concerned about hacking or battery issues Only need access for yourself or one person Have a limited budget Hybrid Security Tip: Combine Both Some renters choose to use both types of locks for maximum protection. For example, use a smart lock provided by the facility and add your high-quality disc lock as a physical backup. Facility Policies Matter Too Before purchasing any lock, check with your storage facility. Some locations: Require specific types of locks (e.g., disc locks only) Offer smart locks as part of the rental package May prohibit personal smart locks on units Ask your facility what’s allowed and recommended for your specific unit. Final Thoughts: What’s Safer? Smart locks offer better control, monitoring, and flexibility, especially for tech-savvy users or business applications. However, a well-made traditional disc lock remains one of the most secure physical barriers, and its simplicity makes it reliable in any condition. The key to safety isn’t just the lock—it’s using it correctly and being aware of who has access. Looking for secure and modern self-storage options? Visit www.dovestorage.com to explore our range of secure storage units, including facilities with smart lock access and enhanced security features. Whether you choose smart or traditional, Dove Storage has your back.
By Dove Storage June 23, 2025
When using a self-storage unit, proper packing and stacking of boxes can make all the difference. Whether you’re storing personal belongings, business inventory, or seasonal items, knowing how to efficiently arrange your storage unit helps you save space, protect your items, and access what you need more easily. In this guide, we’ll walk you through the best practices for packing and stacking boxes to maximize your storage unit’s capacity while keeping everything safe and organized. 1. Start with the Right Supplies The first step to a successful packing and stacking system is using quality materials. Here’s what you’ll need: Sturdy boxes in uniform sizes for easier stacking Clear plastic bins for visibility and moisture protection Packing tape to securely seal each box Permanent markers or labels for easy identification Furniture blankets or bubble wrap for fragile items Shelving units (optional but helpful for maximizing vertical space) Avoid using old or damaged boxes that can collapse under weight. Uniform box sizes make stacking much easier and safer. 2. Pack Strategically by Category and Weight When packing your boxes, keep similar items together—such as kitchenware, books, seasonal clothing, or business supplies. This makes unpacking and locating items later more manageable.Pack heavier items in small boxes and lighter items in larger ones. This not only prevents boxes from being too heavy to lift but also avoids the risk of boxes collapsing under weight. Quick Tips: Don’t overfill boxes to the point of bulging. Wrap fragile items in bubble wrap or paper. Leave a small air gap at the top and fill it with soft materials to prevent shifting. 3. Label Everything Clearly Proper labeling can save you hours of frustration later. On each box, write: A brief description of contents The room or category (e.g., “Kitchen – Dishes” or “Office – Cables”) An inventory number (e.g., Box 1 of 15) Consider labeling multiple sides of the box so it’s visible no matter how you stack it. Some people also use color-coded labels or QR code apps for digital tracking. 4. Use the “Heaviest on Bottom” Rule When stacking boxes, always place the heaviest ones on the bottom and lighter ones on top. This prevents damage and ensures stability. Heavier items to go at the bottom include: Books Dishes Power tools Files and paper documents Lighter boxes may contain: Linens Toys Seasonal clothing Decorations This simple rule helps prevent toppling stacks and crushed contents. 5. Create a Stable Base and Stack Vertically To maximize vertical space, build your stacks like you would a brick wall—alternating the direction of boxes in each row to create stability. Stacking to the ceiling can save considerable floor space, but always keep safety in mind. Use shelving if you're storing fragile items or want to access specific things regularly. Shelves keep your layout more open and reduce the risk of accidents. 6. Leave an Aisle and Access Points You don’t need to pack everything wall-to-wall. Leave a narrow aisle down the center or along one side so you can reach boxes in the back without unloading everything in the front. Store items you’ll need more often near the front of the unit—such as tools, files, or holiday decorations. Place rarely used items toward the back. 7. Use Furniture and Odd Shapes Wisely If you’re storing furniture, think of it as a space-saving opportunity: Fill drawers with soft items or supplies Use the space under tables for bins or small boxes Place small boxes inside cabinets or on bookshelves Also, remove legs from tables or take apart large furniture to stack pieces more efficiently. 8. Avoid Stacking Too High or Too Deep While stacking high can save space, going too far can lead to falls, damage, or injury. Keep stacks no taller than you can safely reach (usually shoulder to eye level). Avoid stacking fragile items more than three or four boxes high unless you’re using shelving. Also, avoid making stacks too deep where items become inaccessible or unstable. 9. Monitor Climate and Moisture If your unit isn’t climate-controlled, take steps to protect your items: Use moisture absorbers like silica gel or DampRid Elevate boxes slightly off the floor using pallets or boards Don’t pack boxes directly against the walls—leave a little air space for ventilation Plastic bins are a good alternative for damp environments, and using sealed bags for clothing or documents adds extra protection. 10. Take Photos of Your Setup Once your unit is packed and stacked, take photos of the layout and label positions. This can serve as a reference if you need someone else to access the unit or if you forget where you placed certain items. Keep a copy of your item inventory on your phone or in cloud storage for easy access. Packing and stacking your storage unit properly doesn’t just help you save space—it ensures that your items remain safe, accessible, and well-organized. By using consistent box sizes, labeling clearly, stacking smartly, and planning your layout, you can maximize your storage investment and avoid the frustration of clutter or lost items. Need a secure, clean, and easy-to-access storage unit? Visit www.dovestorage.com to find the perfect storage solution near you—and pack smarter with confidence.
By Dove Storage June 17, 2025
When it comes to renting a self-storage unit, one of the most important decisions you'll make is choosing between indoor storage and drive-up storage. Both options are widely available across the U.S., but each has unique benefits depending on what you’re storing, how often you need access, and your overall priorities. In this guide, we’ll break down the key differences between indoor and drive-up storage and help you decide which option best suits your needs. What Is Indoor Storage? Indoor storage units are located inside a building that’s accessible through a secure entry point. Tenants typically enter using a keypad code and navigate hallways to access their unit. These units are often climate-controlled, which means they maintain consistent temperature and humidity levels. Best for: Items sensitive to temperature and humidity (electronics, wood furniture, documents) People storing long-term or seasonal items Those concerned about theft or environmental exposure What Is Drive-Up Storage? Drive-up storage units are similar to a personal garage. You can pull your vehicle directly up to the door of your unit for easy loading and unloading. These are usually exterior units with wide driveways and may or may not be climate-controlled. Best for: Frequent access and heavy or bulky items Businesses storing tools, inventory, or equipment People moving and needing fast, regular access Key Factors to Consider When Choosing Between Indoor and Drive-Up Storage 1. Ease of Access If convenience is your top priority, drive-up units are tough to beat. You can load and unload items quickly without dealing with hallways, elevators, or tight turns. This is particularly useful for: Furniture or appliances Large quantities of boxes Business deliveries or pickups Indoor units, while more secure, often require more effort to access. If you only need to visit your unit occasionally, this may not be a problem. 2. Climate Control Indoor units are more likely to offer climate-controlled environments, which can help protect your items from: Extreme heat or cold Humidity Mold and mildew Warping or rust If you're storing antiques, electronics, artwork, important documents, or musical instruments, climate control is highly recommended. While some drive-up units also offer climate control, it's far less common. 3. Security Indoor storage generally provides a higher level of security: Gated access to the building Monitored entry points Surveillance within hallways Limited visibility from outside Drive-up units, while often in gated lots, may be more exposed and vulnerable to break-ins if the facility lacks modern security features. If security is a major concern, indoor storage may give you more peace of mind. 4. Weather Protection One benefit of indoor storage is protection from the elements. You won't have to worry about: Rain or snow getting into your unit while accessing it Dust accumulation from outdoor exposure Temperature fluctuations impacting sensitive items On the other hand, drive-up units make it easier to transfer items in any weather—just be sure to bring a tarp or umbrella if the weather turns. 5. Cost Drive-up units are often less expensive than indoor units, especially if you're not paying for climate control. However, the price difference can vary based on location, facility amenities, and unit size. If you're storing durable items like garage tools, seasonal decorations, or sporting equipment, a drive-up unit might provide better value. 6. Storage Duration If you plan to store items long-term (several months or more), indoor storage is usually the better option, especially if the items are valuable or sensitive to temperature and moisture. Short-term storage—such as during a move or renovation—might be better suited to drive-up units for quicker access and lower costs. Which Option Is Right for You? Here’s a quick checklist to help you decide: Your Priority Best Option Convenience Drive-Up Security Indoor Climate-sensitive items Indoor Heavy/bulky items Drive-Up Frequent visits Drive-Up Long-term storage Indoor Budget-conscious Drive-Up Choosing between indoor and drive-up storage units depends on what you're storing, how often you’ll access the unit, and your budget. Indoor units are ideal for sensitive items and offer extra security, while drive-up units are great for ease of access and short-term or bulky storage needs. Before making your decision, consider visiting the facility in person, comparing features, and asking about available options like climate control, security measures, and pricing. Need help choosing the right type of storage unit? Visit www.dovestorage.org to browse available indoor and drive-up options, or contact our team to find the perfect unit for your storage needs.